User manual
Recording, reviewing while the tape rolls, markers, clips, and Strip Silence — the whole machine, explained.
Session Recorder is the tape machine that's already rolling. Hit record at the top of a session and forget it: everything that comes out of your speakers (or into your interface) lands on disk in plain audio files, stamped with real wall-clock time. The moment worth keeping happened twenty minutes ago? It's already recorded. That's the whole product — everything else in this manual is in service of that.
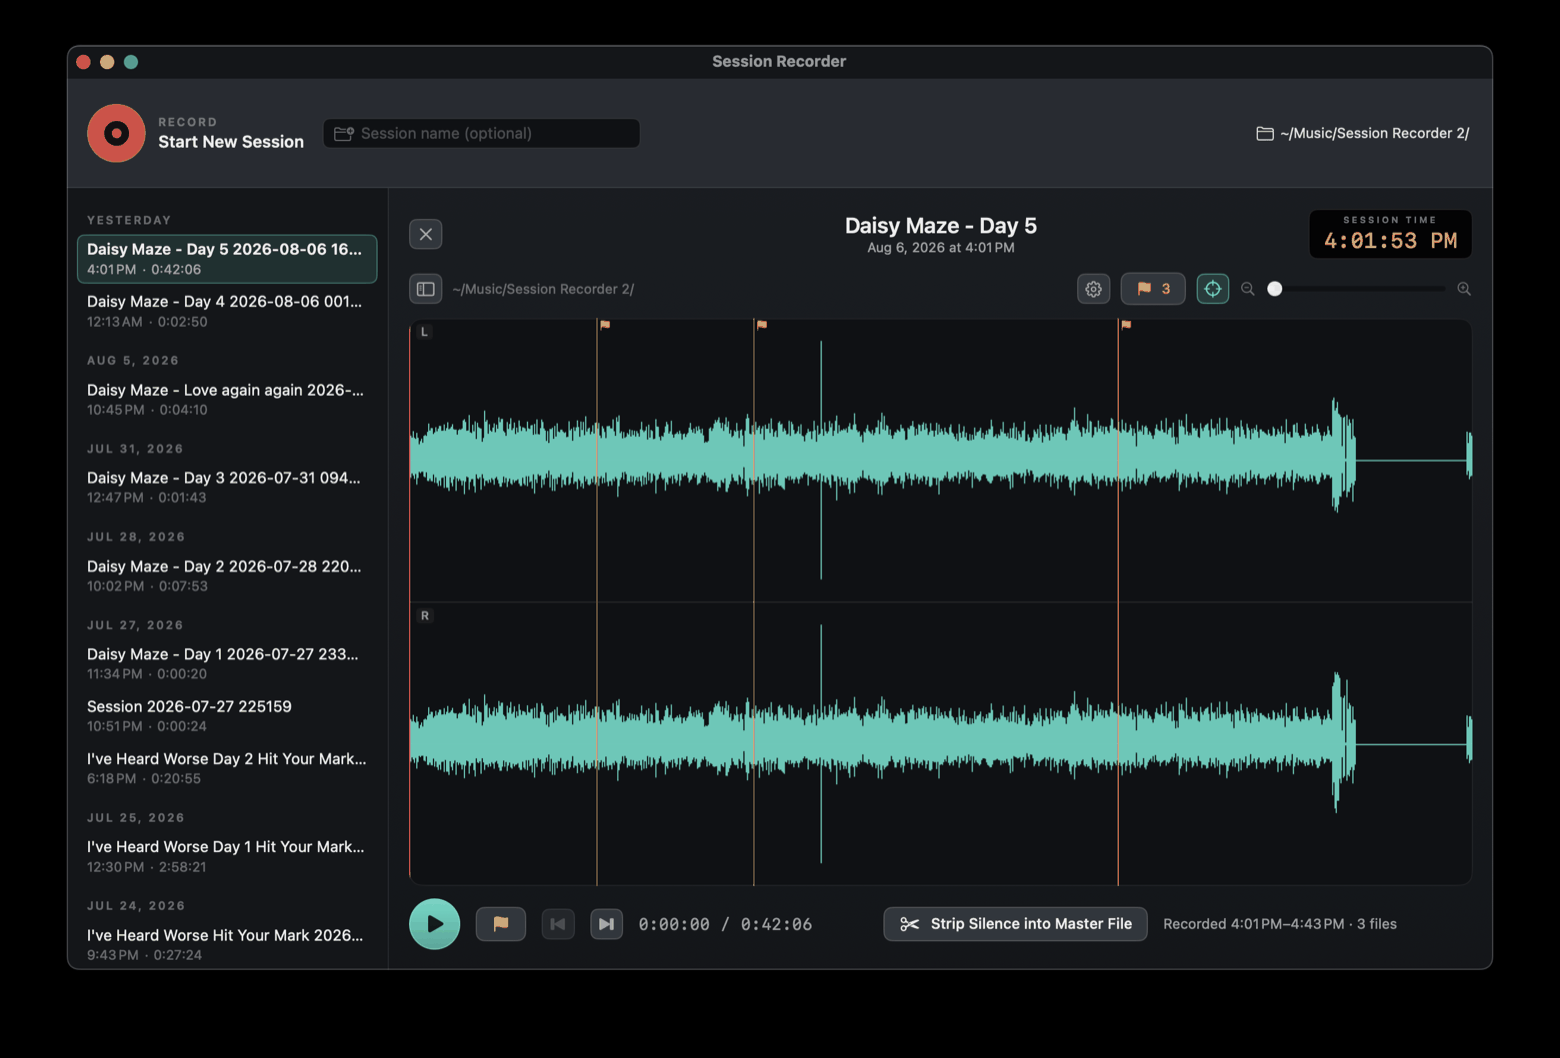
Press Record in the deck (or ⌃⌥⌘R from anywhere — even from inside your DAW; that's the default, and every shortcut here is reassignable). Optionally type a name first; it names the session's folder on disk, with a timestamp appended so every session stays unique. While recording you'll see the timecode counting, a breathing red dot, a live waveform of the last few seconds, and the app's own CPU usage. The CPU readout samples Session Recorder only — not the rest of your Mac. It shows green below 5%, amber to 10%, and red above that: the app is built to stay in the green, so recording never competes with your DAW.
Audio is written in segments — a new file roughly every 20 minutes — so a power cut can only ever cost you the tail, never the session. All of this is invisible in Review, which stitches segments into one seamless timeline.

A flat line in a quiet room is normal. The system tap only ticks while audio is actually playing, so silence produces no data at all — a tape deck rolling on a quiet room, not a failure. The deck shows a gentle hint if nothing has arrived yet.
Changing the output device stops the take — safely. Unplugging your interface or switching to AirPods ends and saves the session (the tap is built on the device that vanished). Everything recorded up to that moment is intact; hit Record Again to continue in a new session on the new device.
This is the trick most tape machines can't do: review the session without stopping it. Click Review So Far in the deck (or the live session pinned at the top of the sidebar, under the red Recording header). The current file is closed on the spot — no waiting for a segment boundary — and everything recorded so far opens in the review pane. Recording continues, unbothered: the deck's timecode keeps counting and the live waveform keeps flowing while you scrub, mark, and clip.
Until you ask for that snapshot, the review pane stays in a calm Recording in progress overview—opening Session Recorder never closes the current file just to populate Review.
Review as many times as you like. Each click takes a fresh snapshot through now; the Live snapshot banner tells you its exact endpoint. Use Refresh for a newer endpoint or Close Live Review to return to the recording overview while the recorder keeps rolling.
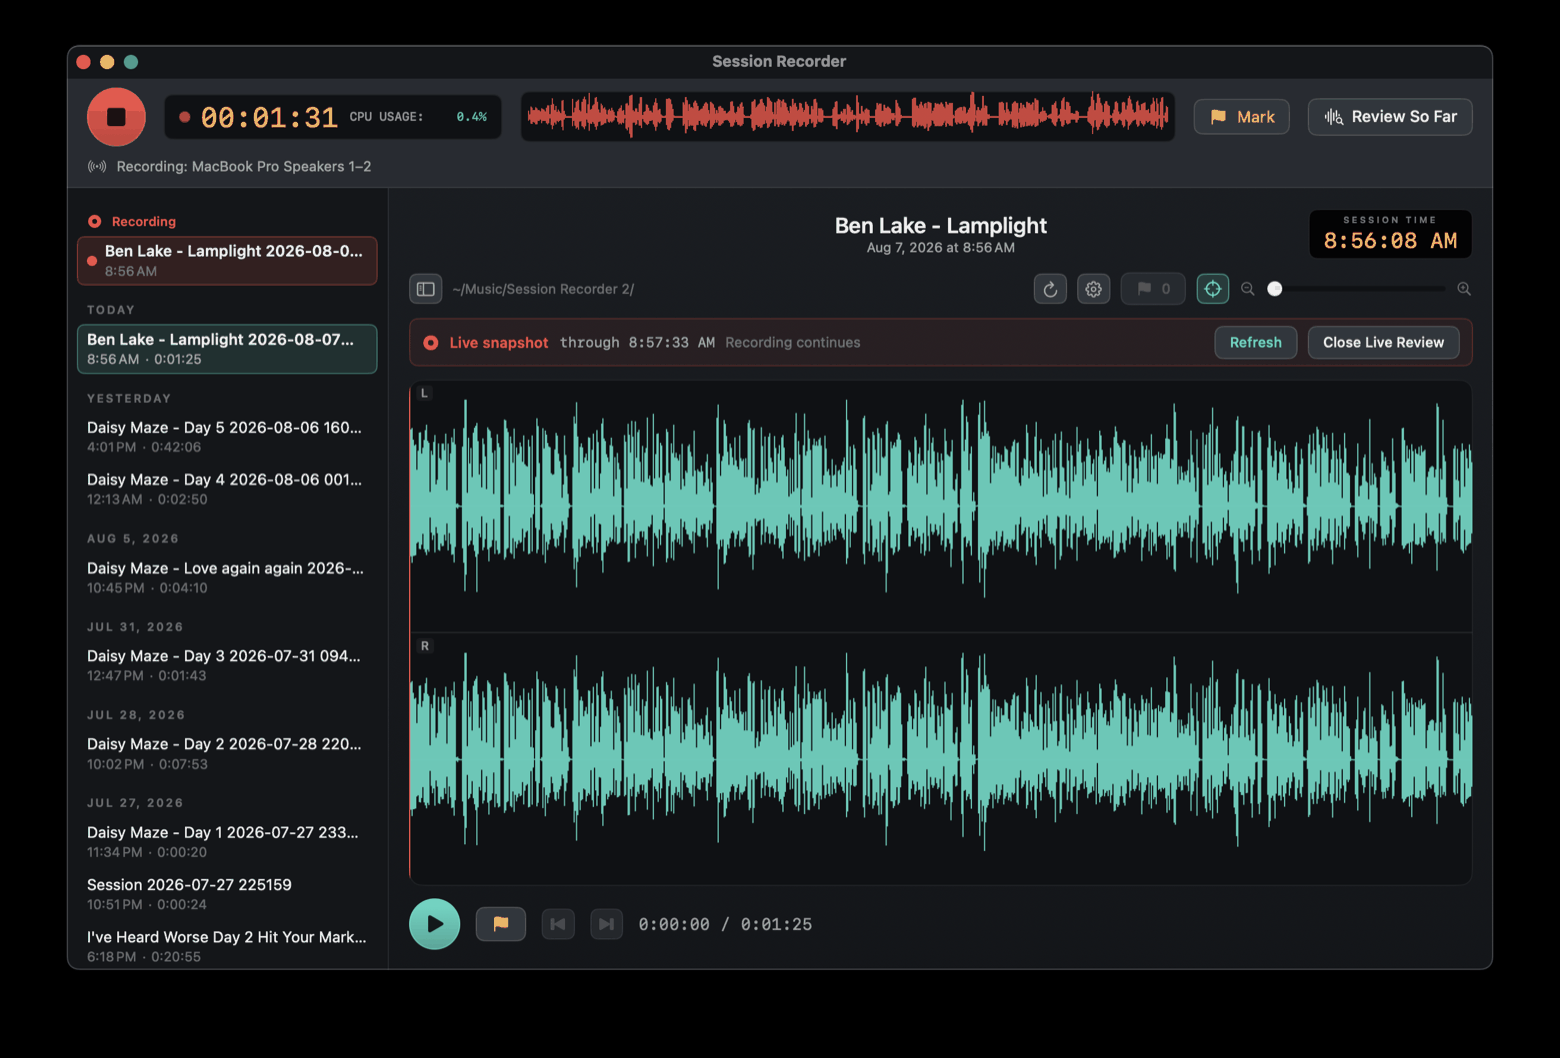
The sidebar lists every session in your recordings folder, grouped by day. Click one to load it: the session's name sits top center with the session clock — the amber timecode readout — at the right. The clock always shows when the audio under the playhead actually happened, in real wall-clock time. On silence-stripped sessions it jumps across the removed gaps as you play; that's the session clock doing its job.

A marker is "that — that moment, right there," stamped with real session time. Drop one while recording with the deck's Mark button, M, or ⌃⌥⌘M from any app (the default); add the note now or later. In Review, mark the playhead the same way.
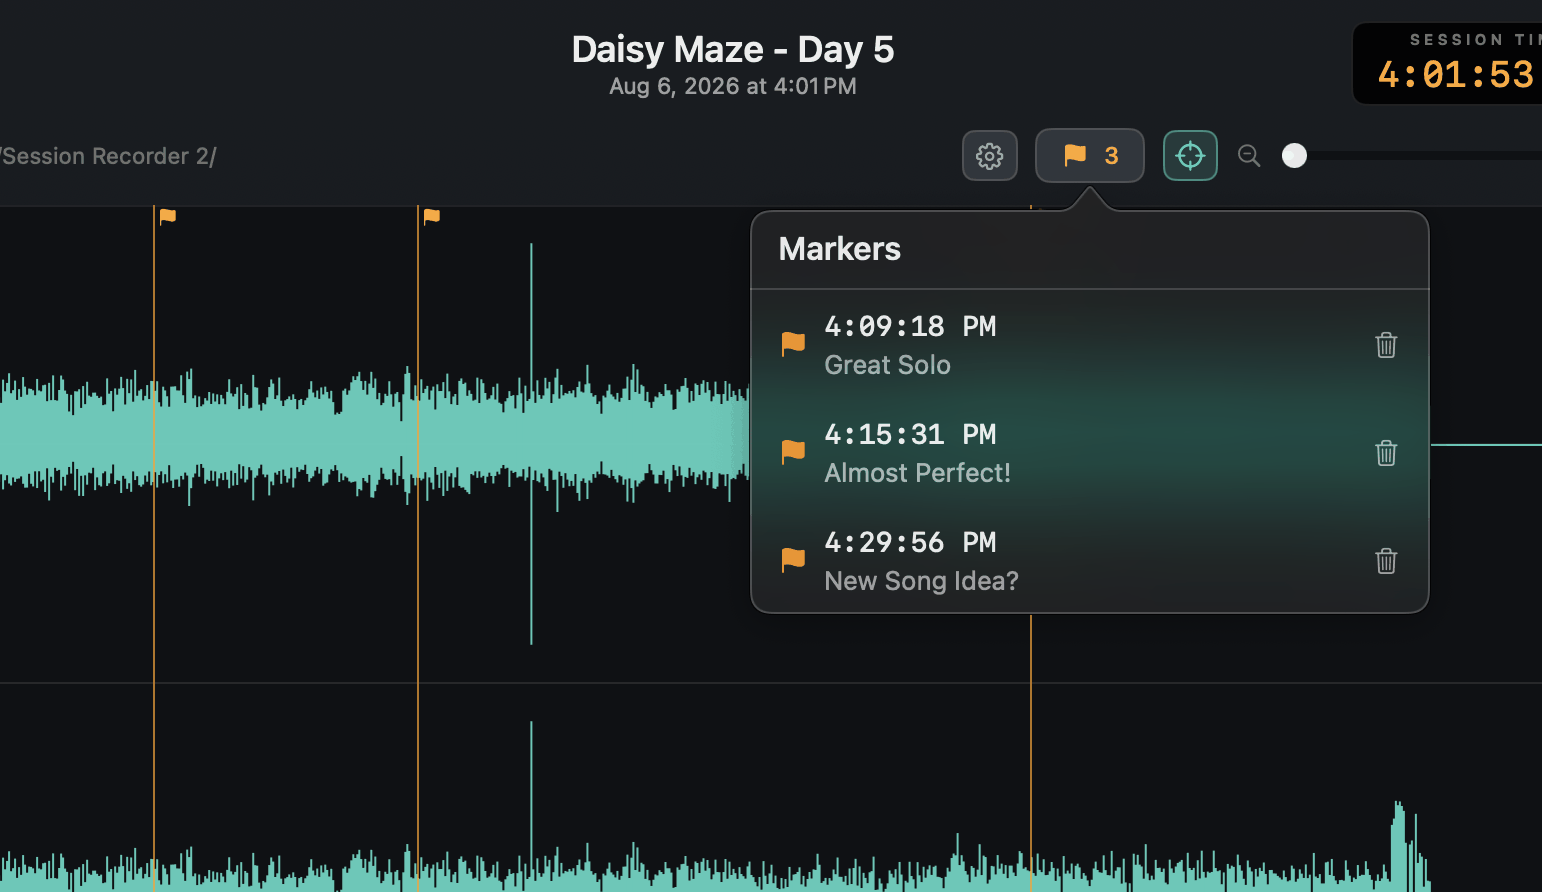
The marker button in the review header (with the count) opens the marker list: every marker with its session-clock time and note. Click one to jump the playhead straight to it — the list stays open so you can audition marker after marker. ⌥←/⌥→ step between markers from the keyboard. Delete a marker with its trash button, its context menu, or Delete when selected. A brief Undo action restores it with its original time and note; deleting a marker never changes the audio. A marker always shows its original session-clock time. If Strip Silence removes that moment, the marker remains at the cut in the waveform without changing its time.
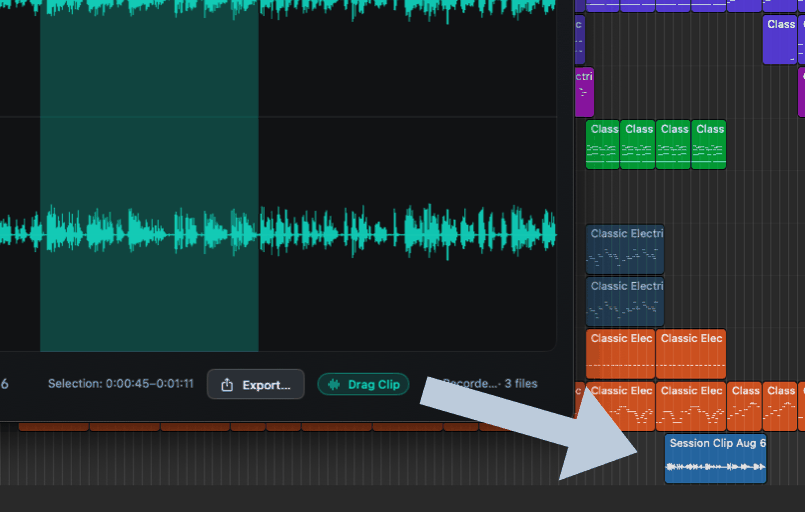
Tracking sessions produce two kinds of audio: the takes you meant to play, and the idea that came out of nowhere between them — the riff nobody will remember tomorrow. Clips are for the second kind.
Select the moment on the waveform, then drag the clip chip straight onto a track in your DAW. The audio renders as the drop lands — a clean file stitched across segment boundaries, named with the session date. Finder, Messages, and Mail all take the same drag. Or use Export Selection… for format choices: WAV and AIFF (lossless, Pro) or AAC.
A three-hour session is often forty minutes of actual sound. Strip Silence into
Master File (in the review pane, or offered right after you stop) reads the
session's raw files and writes one stitched master.wav with the long silences
removed — plus a timeline map that remembers exactly when every remaining moment originally
happened. Stripping writes a new file rather than editing your raw recordings, and the
button shows the result honestly: 887 MB → 5.7 MB. Strip Silence and Strip Again are unavailable while
Session Recorder is recording, keeping post-processing work away from the live capture.
The silence threshold lives in Settings → Recording and defaults to −50 dBFS. If a master keeps too much amp hiss or room noise, raise the threshold (make it less negative) and use Strip Again. The existing master is replaced; the raw recordings remain untouched.
As soon as stripping finishes, Review switches to the condensed master for waveform, playback, selections, and clip export. The app highlights how much space the untouched originals still occupy and offers Free … to move them to the Trash. Keeping those originals is what makes Undo and Strip Again possible.
If you do not want the stripped result, use Undo Strip. Only the derived master and its timeline map move to the Trash; the untouched original recordings stay in place. This option is available until you choose Trash Originals.
To actually reclaim the disk space, use Trash Originals. This is the one step that discards audio: the raw segment files are moved to the Trash and the master becomes the session's audio. The session stays fully reviewable — waveform, playback, markers, clips — and the session clock keeps showing true wall-clock time, hopping over the stripped gaps. But the original recordings are gone for good: Undo Strip and Strip Again are no longer offered, and there is no way to rebuild the session from them afterward. Empty the Trash and they are unrecoverable by any means. Trash Originals only once you have listened to the master and trust it.

Free keeps a rolling window of your most recent recording in AAC — enough to prove the deck's worth on real sessions, with older history visible but locked. Pro unlocks unlimited session length, lossless recording (WAV), lossless exports, and the AU/VST3 plugins for in-DAW capture. A license covers one Mac at a time and moves as often as you like; see pricing.
System-wide (work from any app, made for reaching over from your DAW). These are the defaults — reassign any of them in Settings → Shortcuts:
| ⌃⌥⌘R | Start recording |
| ⌃⌥⌘S | Stop recording |
| ⌃⌥⌘M | Mark this moment |
| ⌃⌥⌘O | Open the Review window |
The ⌃⌥⌘ chord was chosen because DAWs rarely bind it, but studio Macs run a lot of software and collisions happen. If another app already owns one of these combinations, Settings → Shortcuts marks it so you can tell a stolen shortcut from a broken one, and Restore Defaults puts everything back.
In Review:
| Space | Play / pause |
| M | Mark the playhead |
| ← / → | Scrub 5 seconds |
| ⇧← / ⇧→ | Jump 30 seconds |
| ⌥← / ⌥→ | Previous / next marker |
| ⌫ | Move selected session to Trash (confirmed) |
| Return | Commit a rename; Esc cancels |
The waveform is flat and the timer says 0:00. Nothing is playing. System capture only receives audio while sound is actually coming out — play something and the meter wakes up. If sound is playing and nothing arrives, re-grant System Settings → Privacy & Security → Screen & System Audio Recording.
"Recording stopped — the output device changed." The output device the take was built on went away (unplugged interface, Bluetooth switch). The take is saved; start a new one on the new device. Session Recorder bounces its Dock icon and puts up an alert you have to dismiss, so this can't pass unnoticed while you're in your DAW. If you want to hear it as well, turn on Settings → General → Play a sound if recording stops or fails unexpectedly — it's off by default, since the sound comes out whichever output is live and a studio Mac may have mics open.
A session shows a yellow warning in the sidebar. Its
session.json couldn't be read. The audio files are still in the folder —
right-click → Reveal in Finder.
"vX.Y is installed on disk — Restart to Update." A newer copy of the app replaced the one on disk while this one was running. Click it — a live recording is stopped and saved first, then the new version takes over.
Something this manual doesn't answer? Contact us — a real person will help.
 Session Recorder